Category Website Tips
using the maps
Altering the page
Altering The Page

Changing the Text Size
Is the size of the text too small or too big for you? You can change it easily by going to the top right corner of the page where it says, “Change font size”. There are three blue boxes containing the letters “a+“, “a”, and “a–“, from left to right. Each time you click on the “a+” box the text will get bigger. Each time you click on the “a–” box the text will get smaller. Clicking on the “a” box will restore the text to its original size.
Changing the text size in this way has no effect on the images.

Changing Text and Images
You can change the size of both text and images by zooming in or out. You can do this by going to the menu bar of your browser (the toolbar that says File Edit View History Bookmarks Tools Help), selecting View, and then clicking on Zoom In, Zoom Out, or Reset. Exactly how you do this depends on your browser (Internet Explorer, Firefox, Google Chrome, etc.).
An easier and quicker way is to press the Control (Ctrl) key and keep it pressed while pressing the + or − or 0 (zero) key. Ctrl+ makes everything bigger, Ctrl− makes everything smaller, while Ctrl0 resets everything to the original size.
Website Tips side
Website Tips
Viewing Images.
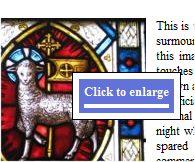
 Many of the images on the website may be enlarged. If you allow the mouse pointer to hover over an image (without clicking any mouse button), and if the image is capable of enlargement, a small message box will appear with the message “Click to enlarge” (as in the image on the right). Clicking the left mouse button will then produce the enlarged image. The enlarged image appears with a border and, often, a title and is usually sized so as to nicely fill the screen from top to bottom.
 Most enlarged images may be further enlarged. If this is the case, a small square box will be visible in the top right corner of the enlarged image. The square contains four arrows pointing in towards the centre of the square. If you allow the mouse pointer to hover over the square, the symbol changes so that the arrows point outwards and the label “Enlarge” appears, as in the image on the left. Clicking the square will then cause the image to be further enlarged, though sometimes this is not appreciable. If the further enlarged image is very big, it may be moved left-right or up-down using the scroll bars to bring the area of interest into view.

Having further enlarged the image, if you allow the mouse pointer to hover over the small square once more, the symbol changes again so that the arrows point inwards and the label “Shrink” appears, as in the image on the left (if the further enlarged image is very big the square may disappear off the screen, but it can always be brought back into view using the scroll bars). Clicking the square will then cause the image to shrink to the original enlarged size.
At the bottom left of both the enlarged image and the further enlarged image there is a small square with an “X” in it, as in the image on the left. Clicking this square will close the enlarged images.
A quicker way of closing an enlarged image is simply to click somewhere just outside the enlarged image.
